Tips for Better Portraits:
| 5_tips_for_better_portraits.pptx |
5 Tips for Better PortraitsClick HERE to view the Slides Presentation 5 Tips for Better Portraits
5 Tips for Better Portraits Questions
Please write the answers on your own sheet of paper.
5 Tips for Better Portraits Questions
Please write the answers on your own sheet of paper.
- Why are longer lenses better for portraits?
- Look at slide 7. Compare the effects of the 350 mm lens vs. the 19 mm lens.
- Where specifically do you usually want to focus in a picture?
- Where would you NOT want to crop a portrait?
- Describe why on camera flash is not flattering.
- What is the difference between bounced and diffused flash?
- What is wrong with “spotty shade”?
- What is wrong with using a high ISO in your portraits?
3 Required Portraits
In this unit you will be turning in 3 portraits.
1. Natural Lighting Portrait - taken of someone else in natural light (sunlight or moonlight)
2. Studio Lighting Portrait - taken of someone else OR of you in artificial studio lighting
3. Your Choice Portrait - taken of someone else OR of you in any lighting. Must be one of the following:
In this unit you will be turning in 3 portraits.
- YOU WILL BE THE PHOTOGRAPHER FOR ALL OF THEM.
- For some reason this is always confusing, so please read the directions carefully.
- If you want to be the photographer AND the subject in the photo you have to be fully in charge of the photo. This means YOU:
- set the camera's settings
- choose the location and pose
- take the test photos
- someone else can press the button for you, but that's it.
1. Natural Lighting Portrait - taken of someone else in natural light (sunlight or moonlight)
2. Studio Lighting Portrait - taken of someone else OR of you in artificial studio lighting
3. Your Choice Portrait - taken of someone else OR of you in any lighting. Must be one of the following:
- Full body portrait
- 3/4 Portrait
- Headshot
- Close-up Portrait
- Environmental Portrait
First Step:
Writing out Your Plan:
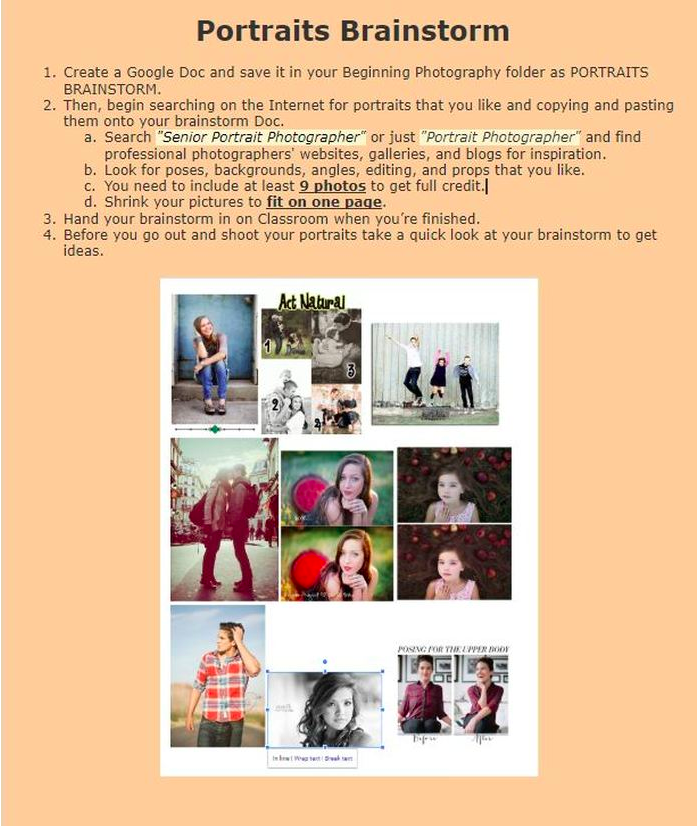
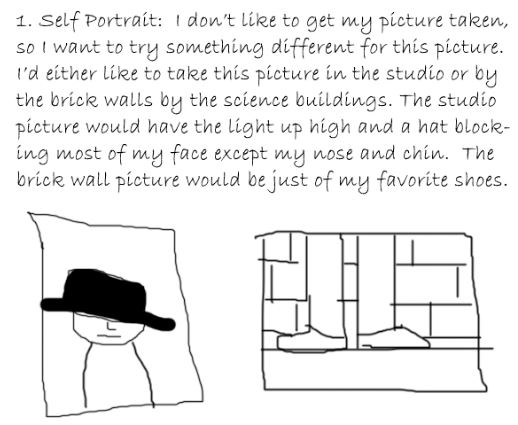
Take out a sheet of paper. Describe in detail how you plan to create your three required portraits. You should include who will be your model, two possible locations to shoot, and two possible poses/compositions. You must also include two sketches to detail these. There is a sample below. Please do this for all three portraits--Self, Natural Light, and "Open". Please show me your sketches before you get your camera to start.
Take out a sheet of paper. Describe in detail how you plan to create your three required portraits. You should include who will be your model, two possible locations to shoot, and two possible poses/compositions. You must also include two sketches to detail these. There is a sample below. Please do this for all three portraits--Self, Natural Light, and "Open". Please show me your sketches before you get your camera to start.
More Details about Portraits:
1. Natural Lighting Portrait:
Taken in natural light (sun or shade) of whoever you'd like.
It may be Candid, which means it is not posed, or posed. We'll learn strategies to get a good candid shot in class. It may mean having a conversation while you shoot, telling jokes, or in some way getting the subject to relax and be themselves.
If you're going to do something more posed it's up to you to do your research and plan some flattering ways to pose your subject including what they should do with their hands and what you’ll say to get a good expression on their face.

|

|

|
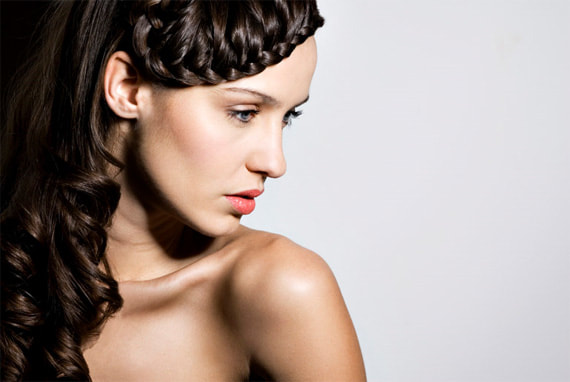
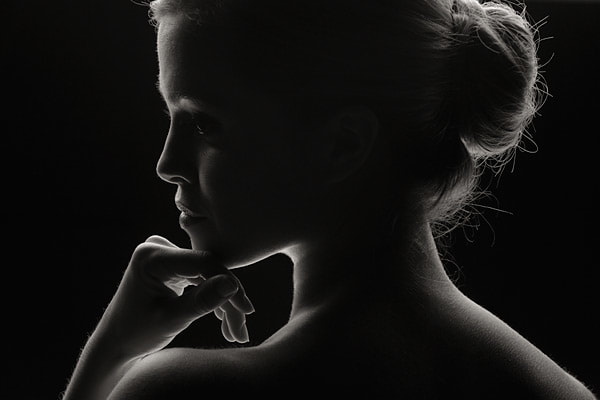
3.Studio Lighting
Taken in studio using the tools we have. We will be learning about these things in class as groups.
3.Studio Lighting
Taken in studio using the tools we have. We will be learning about these things in class as groups.
|

|
|
| portraits___people.ppt |
Location & Posing:
Remote Instructions for Self Portraits:
High Key & Low Key Studio Lighting Setups:
If you feel like a bit of a creative challenge try taking one of your portraits in our classroom studio. I don't teach all beginning students how to use it, but if you want to learn about studio lighting here's what to do:
- First, look over the links below and search the internet to get a clear picture in your mind of how you'd like your photo to be lit--lots of light, low light, back light, etc. If you know the look you're after it's much easier to set up, which will give you more time to shoot.
- Then, check out a "studio camera," which is just a regular camera with the studio light transitter attached.
- Next, ask a Peer Tutor to help you get things set up. The general setup directions are taped to the mirror in the studio, but you'll also want a Peer Tutor to help you your first time. Take a couple practice shots to get your lighting right while the Peer Tutor is still helping you. Once your lighting looks good you can shoot away until you get the shot you're after.
- When you're done be sure to turn off the lights, clean up, and turn off your transmitter.
